How to Change the Language of Zoho App
The steps to change the language settings displayed in ZoHo are as follows.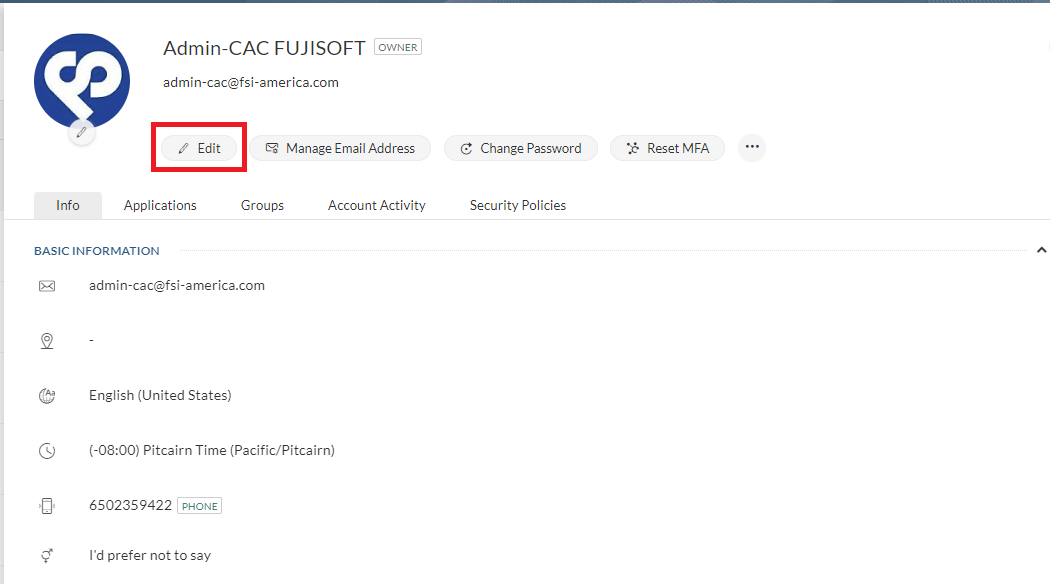
- Open Zoho One.
- Click the gear icon in the upper right corner of the screen.
- In the App settings Directory screen, select "User".
- Select the relevant account.
- In the account details screen, click "Edit".
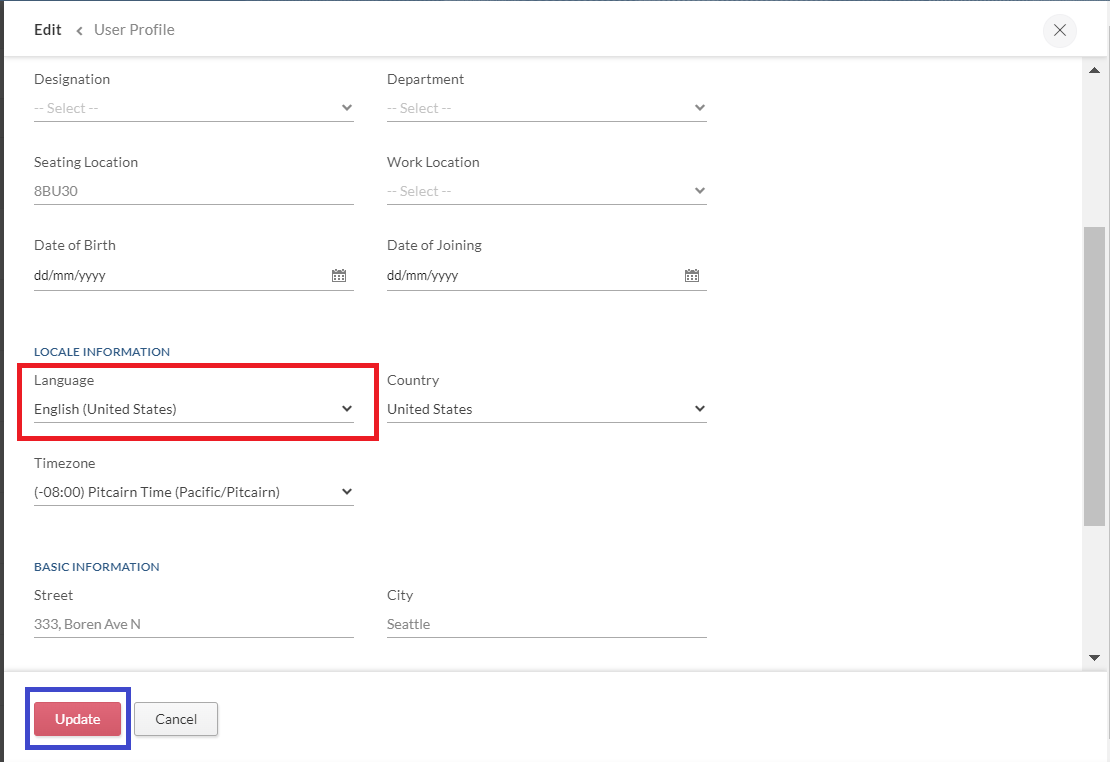
6. In the User Profile screen, select the desired language from the "Language" dropdown under "LOCALE INFORMATION".
7.Click "Update" to complete the changes.
Related Articles
How to Check an Account's Access Rights to the Analytics App
Open Zoho One. Click the gear icon at the top right of the screen. On the App settings Directory screen, select [User]. Select the relevant account from the user list. Select Application Tab on the account details screen. Place the cursor on ...How to Change Declined Sales Returns to Approved
Sales Return records mistakenly marked as [Declined] in [Return Status] can be changed to [Approved] by following these steps: 1. Open Zoho Inventory. 2. Click on "Sales Returns" to navigate to the Sales Returns screen. 3. On the Sales Returns ...How to remove/add memo in an invoice pdf.
Open ZoHo Inventory. Click the gear icon at the top right of the screen. Select [Items] > Field Customization > MEMO on the Settings screen. Change the "Show in All PDFs" settings. To display: Set to "Yes" Not to display: Set to "No" <Notes> 1. If ..."Quantity recorded cannot be more than quantity ordered" alert when packing DO
The alert "Quantity recorded cannot be more than quantity ordered" appears when attempting to pack a Delivery Order if the packed quantity exceeds the ordered quantity in the Sales Order. Here are most common causes for this issue: 1. Outdated Sales ...How to Issue a Credit Note from Sales Return
1. Open Zoho Inventory. 2. Click on "Sales Return" under "Sales." 3. Select the relevant record from the "All Sales Returns" screen. 4. Click on "Create Credit Note" on the record details screen. 5. Click the button with the arrow inside the blue ...